This is a simple DIY nail repair trick that I have been using for years. It's great for the those that need an urgent fix for their own nails, but I've also found it to be invaluable as a professional Nail Technician when I'm working on the set of a film or photo shoot where there isn't time to do a full silk or fiberglass wrap.
Supplies:
· paper tea bag
· nail file
· buffer
· tweezers
· nail glue
Steps:
1. Trim and file nail if necessary.
2. Cut the top off of a paper tea bag and pour out the tea. You can also use a coffee filter in an emergency, but
remember it is thicker and will require more buffing to prevent the
seams from showing.
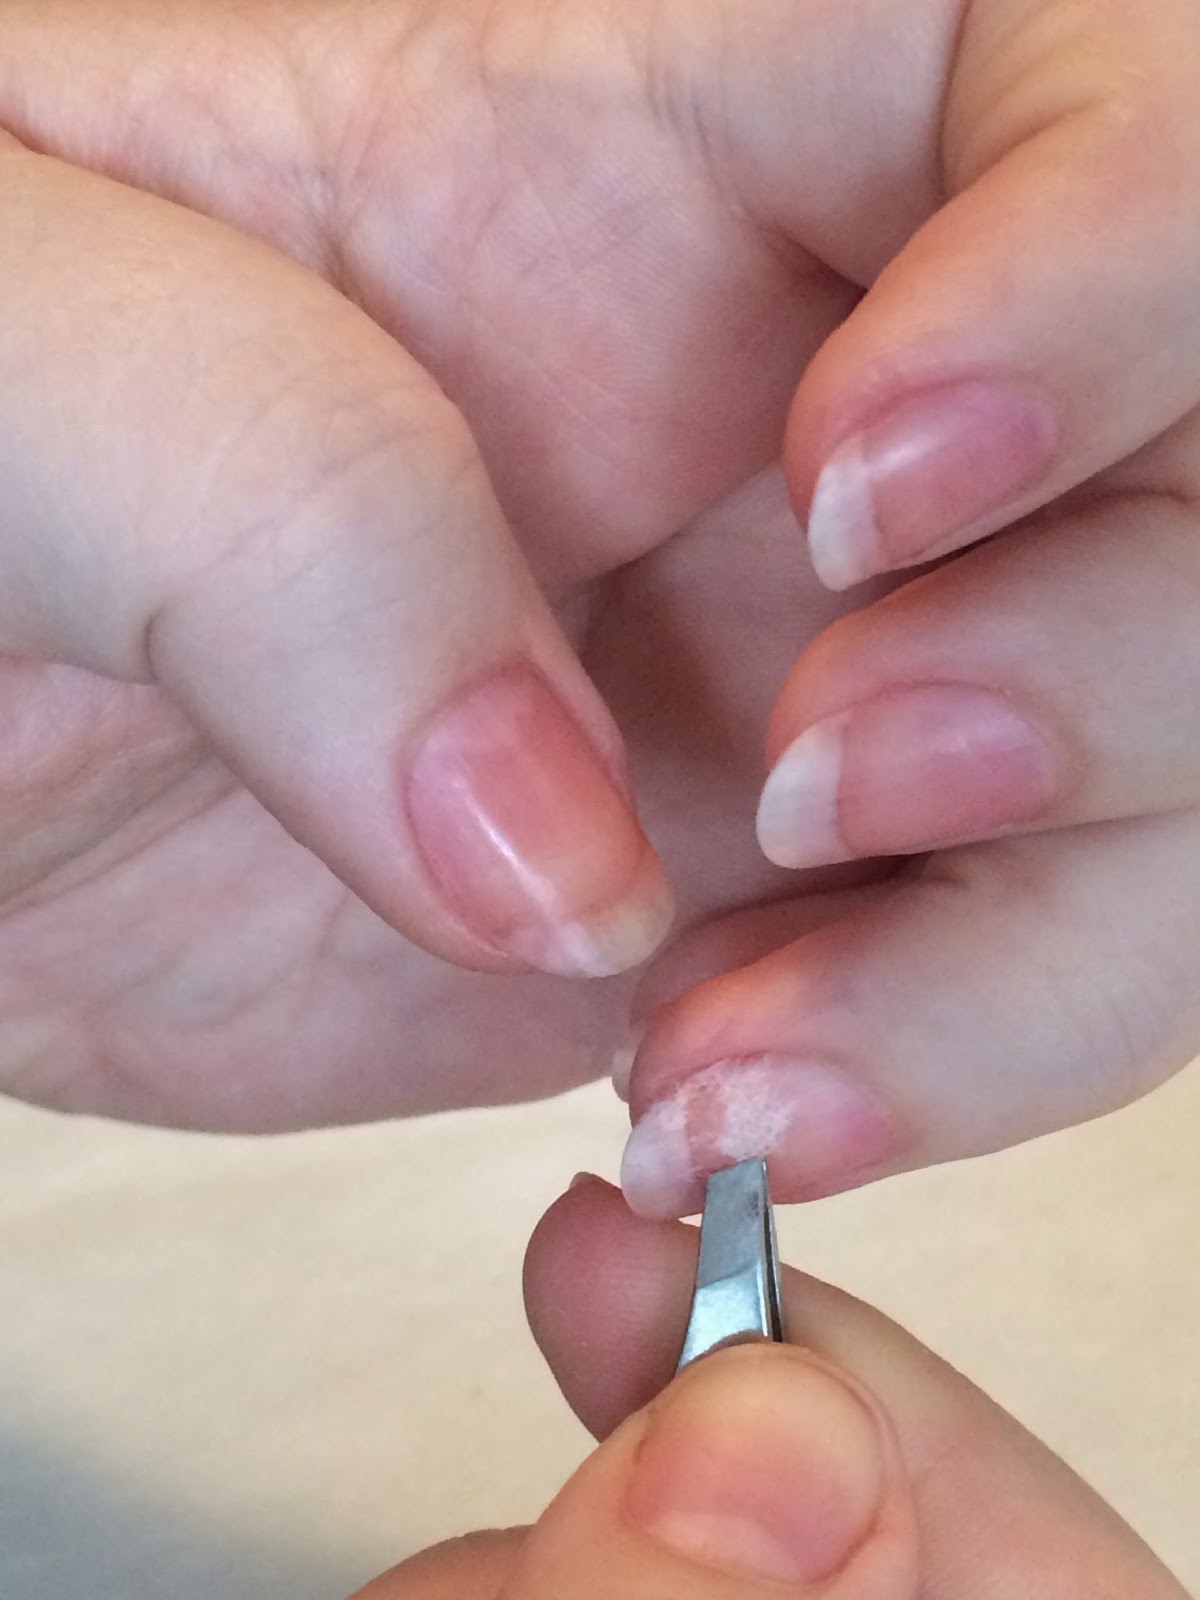
3. Tear (do
not cut) a small piece of the empty tea bag into a patch to cover the break in your nail. Cutting the patch will leave a ridge along the edges, while
tearing allows the fibers to seamlessly blend into the nail.
4. Place a small dot of nail glue over the break in the nail and
use the tweezers to place and press the patch down over it. The patch
will absorb the glue and form a bond to the nail over the break.
5. Once dry, gently buff over the edges of the patch to blend it into the nail.
6. Finish with a clear top coat or to hide the patch, polish your nails as usual with a base coat, two coats of color, and a top coat.
Voila! You have a perfect manicure once again and the offending break is
reinforced while the nail has time to grow out. You can remove the patch
easily with nail polish remover or leave it in place until the break
has grown out enough for you to clip and file the nail.


No comments:
Post a Comment